  |
|
In this tech article, I outline how to upgrade the factory jack in any 1998-2011 Crown Victoria and Grand Marquis. Throughout the run of the
Panther platform, Ford needed to cut costs wherever and whenever possible. They determined that by eliminating the factory jack mounting,
they would be able to cut a worthwhile amount of money to the overall cost of production. This type of practice is what's called de-contenting.
For the 1998 model year body revision of the existing platform, the factory jack was mounted in the trunk on the inner passenger side quarter panel.
However, Fords cost-cutting eventually required that the jack be relocated to the trunk shelf.
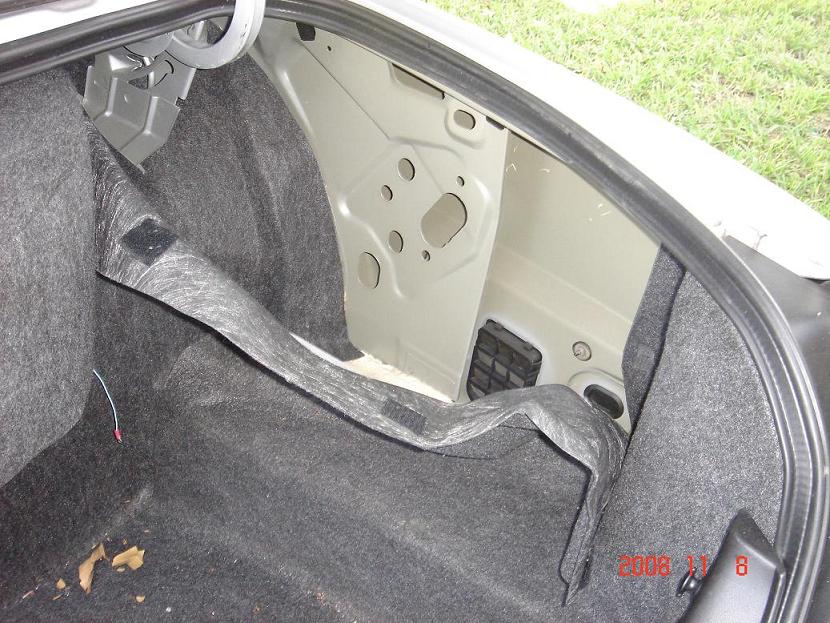
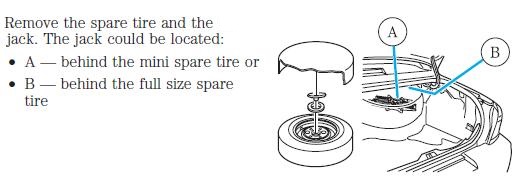 (Picture of newer location) Mounting the jack on the shelf required it to either be sandwiched between the seat firewall and the spare tire (location B above), or mounted inside the spare tire itself (location A above). The original side-mounting location (below) was largely discontinued at the end of the 1999 production year, but was re-introduced for specific models such as the fully loaded Grand Marquis LSE, or a single run of HPP LX Crown Victoria Sport models. At some point it was dropped completely. 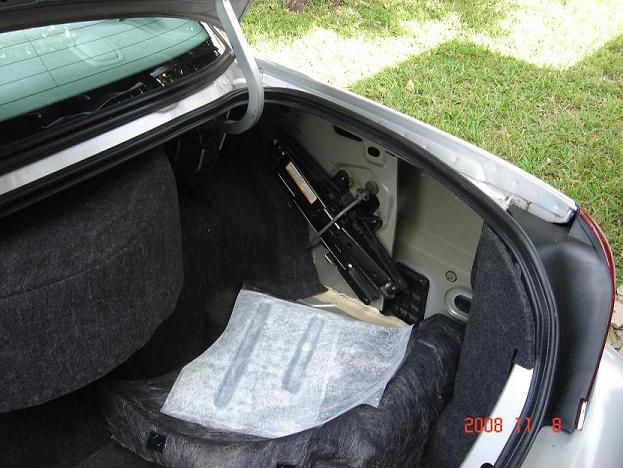 (Picture of mounted tire jack) Because the body on the Crown Victoria has not changed since 1998, the mounting location for the premium jack exists in ALL Crown Victorias of this body style. Youll need several things from a donor car or eBay auction in order to complete the upgrade: - Special Jack, with appropriate mounting holes - Retaining clip & hold-down screw. - Jack Support Bracket (mounts behind the fender firewall) - (Optional) Carpet with the added plastic or cardboard protective backing. You can also order the parts from the dealer using the below parts document: 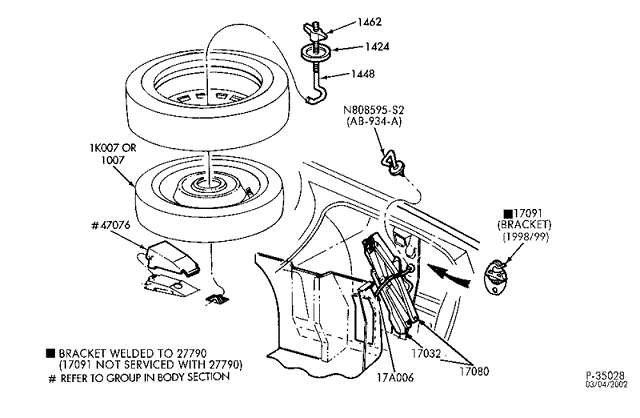 The best candidate vehicle to look for would be a junkyard P71 from 1998-1999 as most of these police cars automatically came with the jack; however, any Crown Victoria from those years would likely come with this setup anyway. Many owners have reported that the side-mounted jack was more common with vehicles that came with the small temporary spare as well. Completion of this upgrade should be fairly easy, with the most difficulty being the removal of the backing plate from the donor car and reinstallation of it on your own car. This is due to the fact that the backing plate is held in place with spot welds. If you have access to a sawzall, then its easiest to cut out the entire area and remove the spot welds at home. Otherwise, you can do what I did, and that was to stand there for 2 hours prying at it with a flat-head screw driver until the welds broke. If you follow this method, be sure to beat it flat (carefully) with a hammer and anvil before re-installation. Installation will go easier if you have a welder, or a spot welder. Otherwise youll need to drill holes and install nuts and bolts (preferably with the nuts on the side facing into the fender for aesthetics). Once the backing plate is installed, the jack will simply mount (as shown in the pictures below) and the hold-down will keep it in place. This upgrade wont decrease your lap times or improve your acceleration, but it is cleaner looking and gives you more room to hide an amp behind your spare tire!
Note: Ford also included with either jack stowage location, a "throw-in" double-sided, laminated instruction manual. The part number for this manual was "1W1A-17A083-AA" and included notes for "Tire Changing Instructions" on the front, and "Jack Usage and Stowage" on the back. |


|
|