  |
 If you're looking to replace the steering wheel in your 1998-2004 Ford Crown Victoria, Grand Marquis, or Lincoln Town Car, here is a simple walk-through. Although little has actually changed in steering wheel removal from your father's Cutlass to the modern cars today, there are a few simple differences you should know that will make the process safer. In this example below, I am removing a perfectly good steering wheel to replace it with a similar style wood steering wheel. *NOTE: The wood steering wheels were available in some rare situations on the Crown Victoria randomly through the production years of 98-2004. It was a much more common feature in the high end LS and LSE models of the Grand Marquis, and an even more common option on the Lincoln Town Car. The steering columns are all identical, so for the most part, all steering wheels will interchange. While all steering wheels are mostly identical, there are several different distinctions:- Radio Controls w/ HVAC and Cruise - Cruise Control only - No buttons - Leather / no leather - Combination of the above w/ real wood insets & leather Although the buttons are all the same, it's worth mentioning that on some radios, the controls are programmed differently. Buttons on a 2002 steering wheel will not always work with the 2003+ radios. For example, a steering wheel from a 2002 Crown Victoria LX will not be able to properly control a 2003 MACH-1 MP3 / CD combination radio. The singal is apparently different. It is advisable at this point that you would want to either swap out the buttons from a newer wheel, or go with a radio that is compatible with your stereo. Also note that the clock springs may not be completely interchangeable as well. The clock spring is sandwiched between the steering wheel and the steering column. It is used by the Air Bag Deployment System as well as the radio and cruise controls. It's adviseable that you order the correct one for your vehicle. Clock Spring for a 1998-2000 CV / GMQ / TC - P# F8AC-14A664-AA Clock Spring for a 2001-2004 CV / GMQ / TC - P# 1W1T-14A664-AE To be safe, it's easier to swap steering wheels within these ranges, but it is not necessary. STEPS FOR REMOVAL: 1 - The first step for removing the steering wheel is to disconnect all power from the vehicle to prevent a potential unwanted airbag deployment. There is no memory in the car's computer or air bag system that would cause unwanted deployment, but the possibility of creating a spark or an arc when disconnecting the air bag connections could inadvertently cause the airbag to deploy (which is both costly and extremely painful). Pop the hood and disconnect both the positive and negative battery terminals, starting with the positive. You can take this opportunity to remove the battery, clean the tray and the battery contacts and terminals. To be on the safe side, leave the vehicle battery unplugged for at least 30 minutes prior to working on the steering wheel, or attempt the start the car to immediately drain any voltage left in capacitors or relays. 2 - The second step in removing the steering wheel is to remove the air bag module. If this module came with a new steering wheel that you
are replacing, it is adviseable to use the one that came with your car. This is important unless you have done your research and spoken with
a knowledable technician. 
(click thumbnail for a larger image) 3 - Once the plugs and screws have been removed, you can now remove the air bag module. Carefully pull the model out with your fingers. It should not be tight and should easily come out with little effort. As you remove the air bag module, take note of the wires that are connected to it. These wires are not interchangeable and will only bolt into the correct slot. There should be three total plugs you will need to remove before the air bag module is completely detached from the steering wheel. The red plug for the horn, and the grey and yellow air bag connectors. Once these three plugs are removed you can easily remove the module and seperate it from the wheel. 
(click thumbnail for a larger image) 4 - The next step is actually removing the steering wheel. The steering wheel is held in place with a beveled, torx socket headed fine thread bolt. To remove this, you will need a T45 male socket bit. Turn the bolt counter clockwise (as with any bolt) and it should easily come out. In addition to the bolt, the steering wheel has been pressed onto the column. Ford has a special two-pronged steering wheel pulley tool, but you can improvise like I did with a basic two pronged harmonic balancer pulley. Carefully hook the pulley hooks into the two slots as shown in the diagram below and crank the pulley tool slowly until the steering wheel pops free. Make absolute sure that you do not damage the threads on the steering column shaft. This is the toughest part of the job, so work slowly and carefully. You do not want to damage the wires or the old steering wheel in case you need to re-use it. Once the wheel has popped free, you will need to remove the final plug connector (white) to completely free the steering wheel from the steering column. 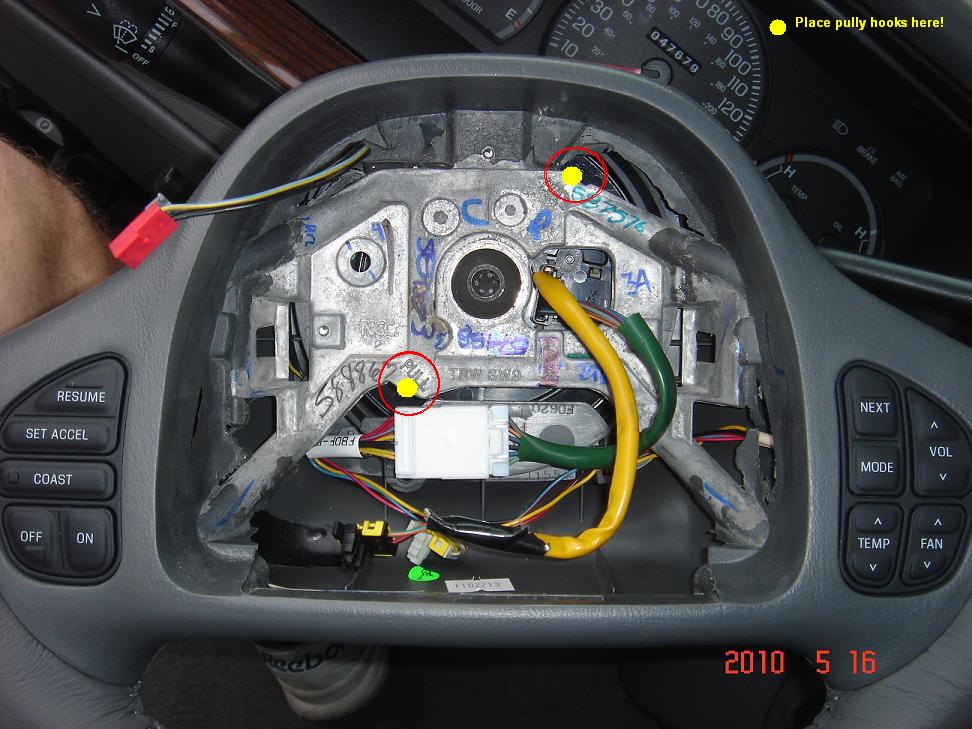
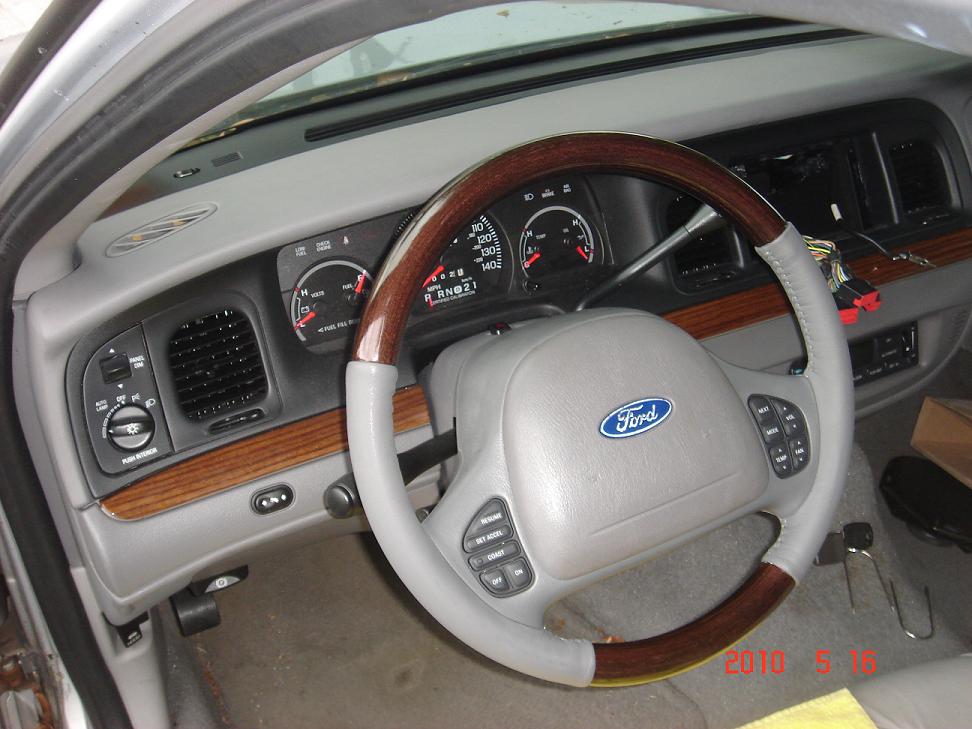
(click thumbnail for a larger image) 5 - The steering wheel can now be replaced with a replacement wheel. It is not necessary to mark the placement as the column shaft is notched to properly accept the wheel. Any adjustment to the wheel's degree would need to be done at the tie rods or the steering box. To install the new wheel, simply follow the reverse of the above four steps. In my example, I replaced my original "light flint" 2002 steering wheel with a brand new wood one from a 2003 Grand Marquis. 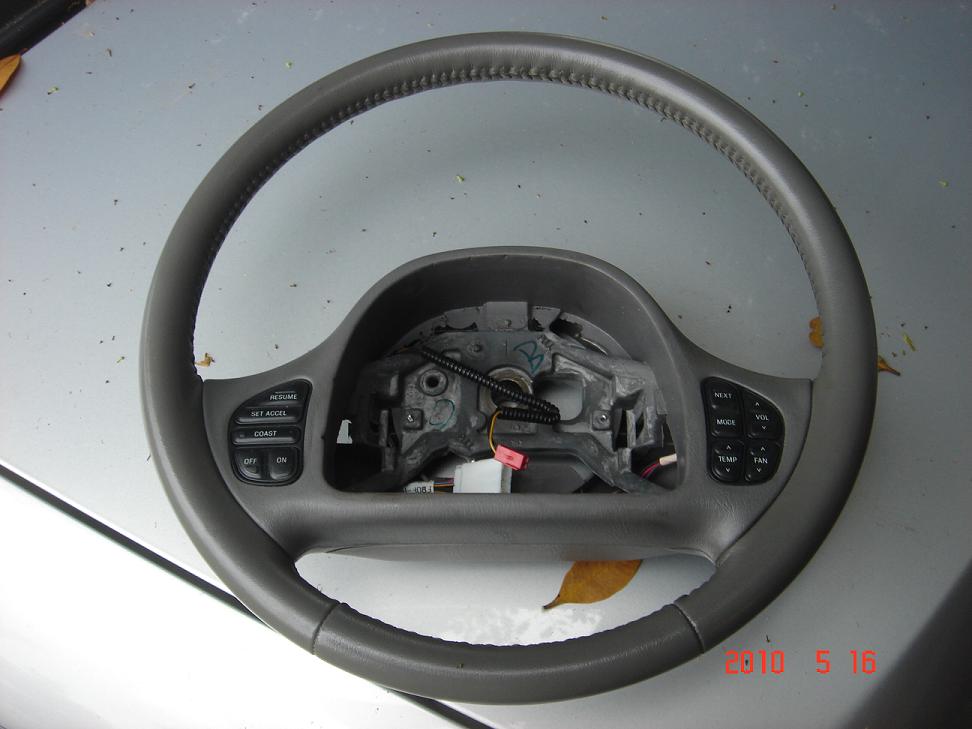

(click thumbnail for a larger image) |
|
|